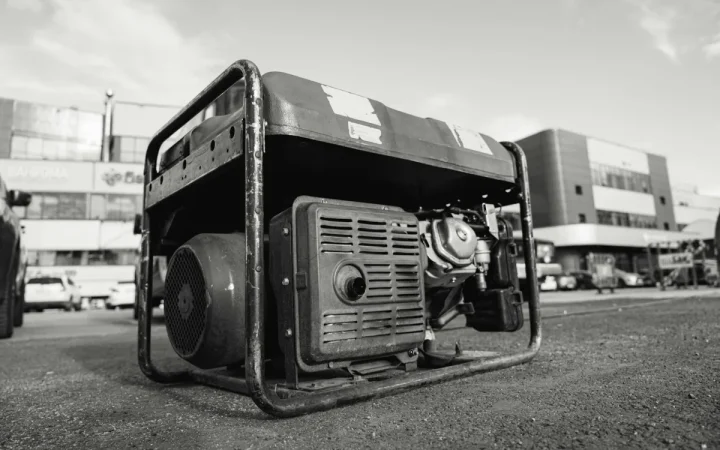

The first ice storm I ever worked as a young electrician, I pulled up to a house where a guy had run a cord from his generator, cut the male end off, and wired it straight into a dryer outlet. He called it a “suicide cord,” and the name is not a joke. That setup can push power back onto the utility lines and kill a lineman working three streets over.
So before we talk about the right way to connect a portable generator to your house, understand that the wrong way is genuinely dangerous. The good news is that the safe methods are affordable, and once one is installed, the whole thing takes about two minutes to fire up during an outage.
I’ve installed dozens of these setups over twelve years in the field. Here’s how I’d walk a first-timer through it.
Key takeaways
- Never backfeed through a dryer or range outlet. Use a transfer switch or an inlet box with an interlock kit.
- A manual transfer switch runs roughly $300 to $900 installed and powers a handful of hard-wired circuits.
- Size the generator to the circuits you actually need, not the whole house. Most homes get by on 5,000 to 7,500 watts.
- Keep the generator at least 20 feet from the house with the exhaust pointed away. Carbon monoxide kills fast.
Why you can’t just plug it into an outlet
A generator makes power. Your outlets are designed to receive power. Plug one into the other and you create a bridge that can send electricity backward through your panel and out to the grid.
That’s the lineman problem I mentioned. It’s also a fire risk, because a household outlet and its wiring aren’t rated to carry a generator’s full output through that single point. If you’re still deciding whether a portable unit even fits your needs, our beginner guide to portable generators for home backup is a good place to start before you spend a dime.
A “suicide cord” (double male ends) energizes an entire outlet, your panel, and the utility drop all at once. It is illegal in most jurisdictions and has killed both homeowners and utility workers. Do not use one, ever.

The three legit ways to connect a portable generator to your house
There are really only three approaches worth your time, and they scale from cheap-and-limited to more-money-more-coverage.
1. Heavy-duty extension cords
The simplest method skips the panel entirely. You run rated cords straight from the generator to individual appliances: the fridge, a space heater, a couple of lamps.
It costs almost nothing beyond the cords, but you’re limited to whatever you can reach and plug in directly. Use the right gauge, because a too-thin cord overheats and drops voltage. Our breakdown of generator extension cords and gauges spells out exactly which wire size handles which load.
2. Manual transfer switch
This is what I install most often for people who want lights, furnace, and outlets without dragging cords all over the house. An electrician wires a small sub-panel next to your main panel with, say, six to ten circuits pre-selected.
During an outage you plug the generator into a wall inlet, flip each circuit from “line” to “generator,” and you’re running. Expect $300 to $900 installed depending on how many circuits and how far the wiring runs.
3. Inlet box with a breaker interlock
My personal favorite for value. An interlock kit is a metal slide plate on your main panel that physically prevents the main breaker and the generator breaker from being on at the same time.
You get access to more circuits than a typical transfer switch, and the hardware is cheaper, often $150 to $250 in parts plus labor. The catch is that the kit has to be listed for your exact panel brand and model, so this is not a guess-and-hope job.
Ask your electrician for an interlock kit that’s UL-listed for your specific panel. A generic plate that “kind of fits” will fail inspection and, worse, may not lock out reliably.
Sizing the generator to the job
The mistake I see all the time is people buying way more generator than they need, or way too little. You don’t power a whole house on a portable unit. You power the things that matter.
Add up the running watts of your essentials, then add the surge watts of the biggest motor that kicks on, usually the well pump or furnace blower. Here’s a rough starting table for a typical home.
| Appliance | Running watts | Surge watts |
|---|---|---|
| Refrigerator | 700 | 2,200 |
| Furnace blower (gas) | 800 | 2,300 |
| Well pump (1/2 hp) | 1,000 | 2,100 |
| Sump pump | 800 | 1,300 |
| Lights and phone charging | 400 | 400 |
Add those running numbers and you land near 3,700 watts, but you never want to run a generator flat out. A 5,000 to 7,500-watt unit gives you headroom for surges and a longer engine life. How long that tank lasts depends on load, and our piece on portable generator runtime shows real hours-per-gallon figures.
What a clean installation actually looks like
On a job last winter in a two-story colonial, the whole install took me about four hours. The inlet box went on an exterior wall near the driveway, roughly 25 feet of cord from where the homeowner stages the generator.
Here’s the checklist I run through on every one of these.
- Confirm the interlock kit is listed for the exact panel model.
- Mount a weatherproof inlet box on an accessible exterior wall.
- Run properly sized wire from the inlet to a new backfed breaker.
- Install the interlock plate and test the mechanical lockout by hand.
- Label every generator-capable circuit clearly inside the panel door.
- Have the work inspected and permitted by the local authority.
That last line matters. Pulling a permit feels like a hassle, but it’s how you confirm the work is safe and how you avoid an insurance fight if anything ever goes sideways.
Running it safely once it’s wired
Hardware is only half the story. The generator itself needs to sit outside, always, at least 20 feet from the house with the exhaust aimed away from doors and windows.
Carbon monoxide from a running generator can fill a garage in minutes, and it has killed people who thought a cracked door was enough ventilation. It is not. The Consumer Product Safety Commission’s portable generator guidance lays out the placement rules, and the federal Ready.gov power outage page is a solid reference for broader outage prep.
Start the generator first, let it stabilize, then flip your circuits over. When power returns, reverse the order: switch circuits back to line, then shut the generator down. If engine noise near the bedroom windows bugs you, look at one of the quieter portable generators next time you upgrade.
Your next move before the next outage
Don’t wait for the forecast to scare you into action. Walk your panel this weekend, note your brand and model, and list the five circuits you’d actually want during a blackout.
Take that list to a licensed electrician and ask specifically about an interlock kit or a small transfer switch. If your outages last for days at a stretch and you’re tired of babysitting an engine, it may be worth reading up on whole-house standby generators or comparing generator fuel types before you commit. Either way, decide now, while the lights are on.